-62%
DB Cinematic Drone LUTs
$39,00 Original price was: $39,00.$15,00Current price is: $15,00.

Vintones Vintage Film LUTs
$29,00 Original price was: $29,00.$12,00Current price is: $12,00.
KODAK 2393 YRGB POWERGRADE
$50,00 Original price was: $50,00.$19,00Current price is: $19,00.
KODAK 2393 YRGB POWERGRADE – This PowerGrade has been completely rebuilt and updated. It is now part of the Print Film Emulation YRGB PowerGrade collection that can be found here. If you haven’t yet received your update email, get in touch.
The new updated Kodak 2393 D65/D55 Print Film Emulation LUT
built as a fully editable Resolve YRGB PowerGrade.
Now updated with the FilmUnlimited Kodak 250D Negative emulation.
We Accept All Major Payment Methods:
Categories: Premium Luts, Photoshop Luts
Tags: 3D LUTs, Free LUT, luts
KODAK 2393 YRGB POWERGRADE
The Kodak 2393 LUT is my favourite of the Kodak Print Film Emulations (PFE). It’s cleaner than the 2383 PFE, with richer, purer colours particularly in the shadows. It also features deeper and more defined blacks vs 2383. I like to use 2393 on projects where I want the film look but without the muddiness of 2383.
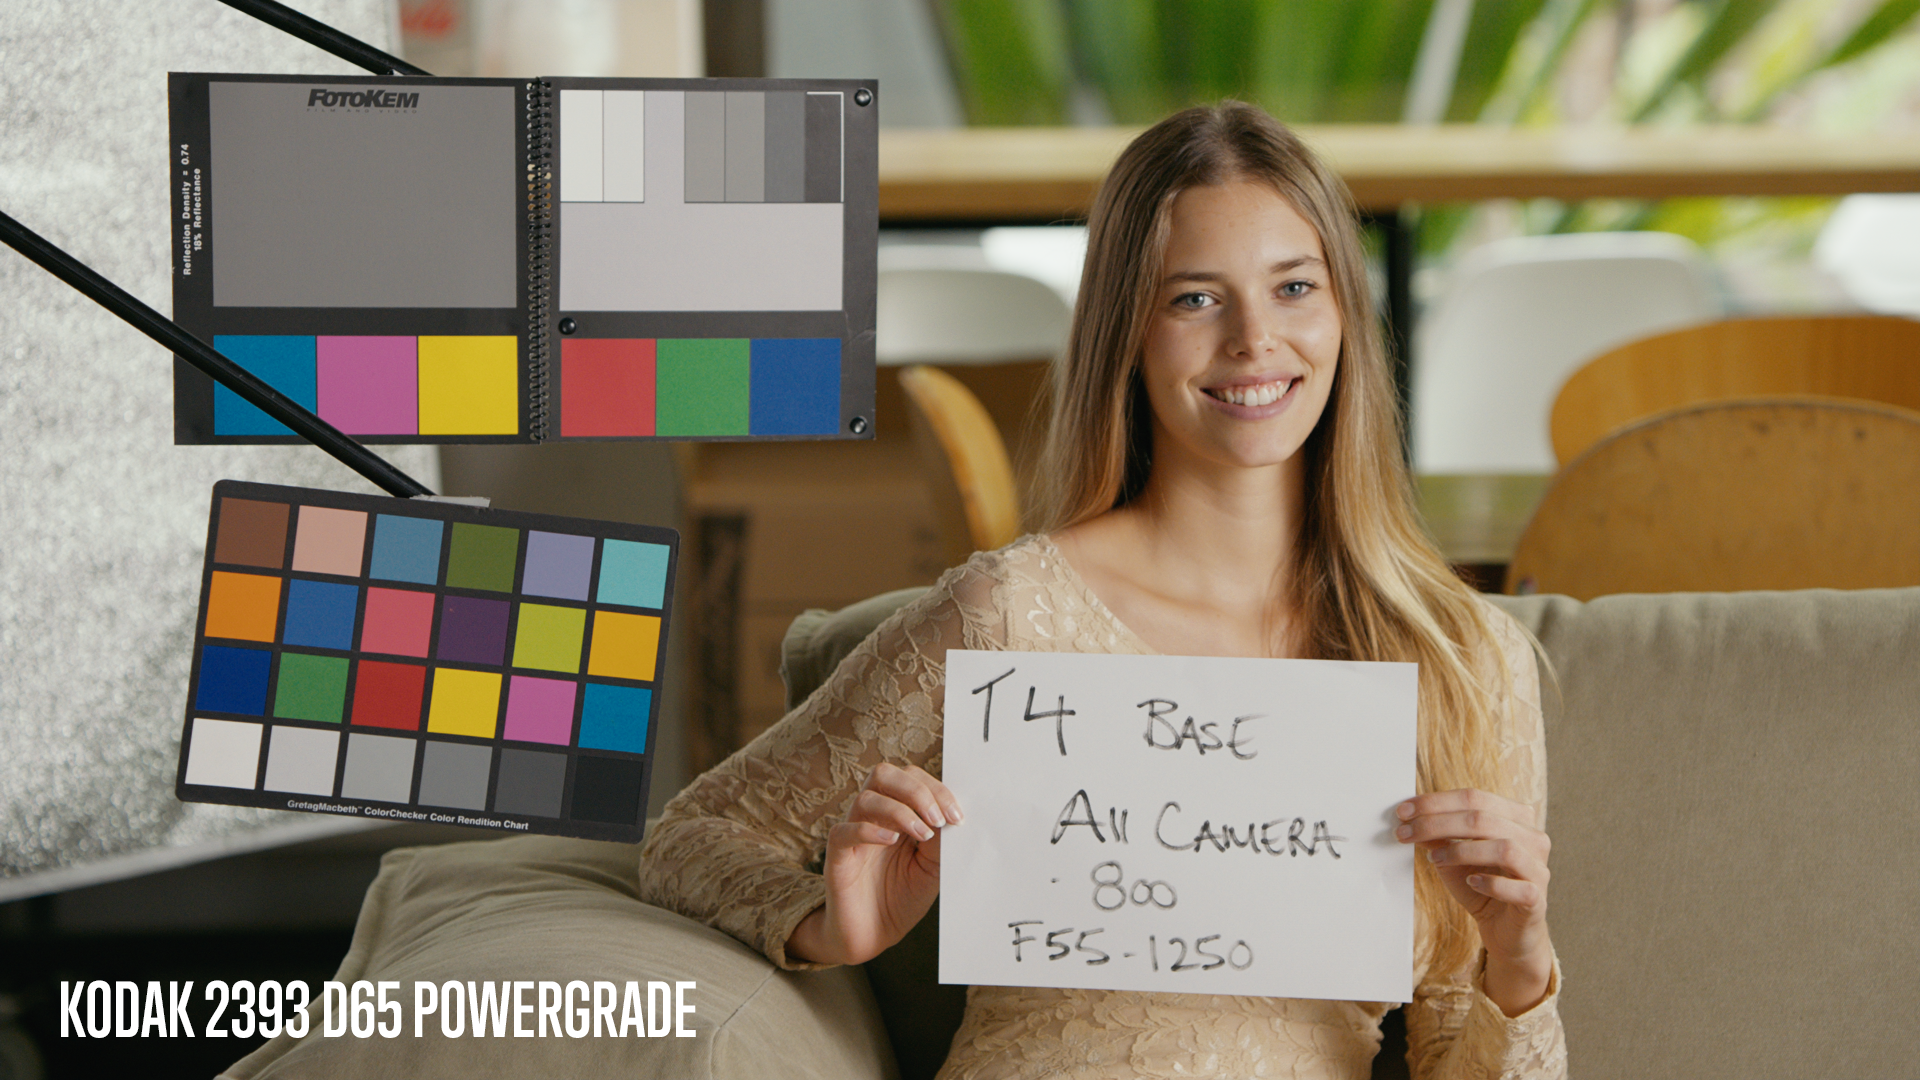
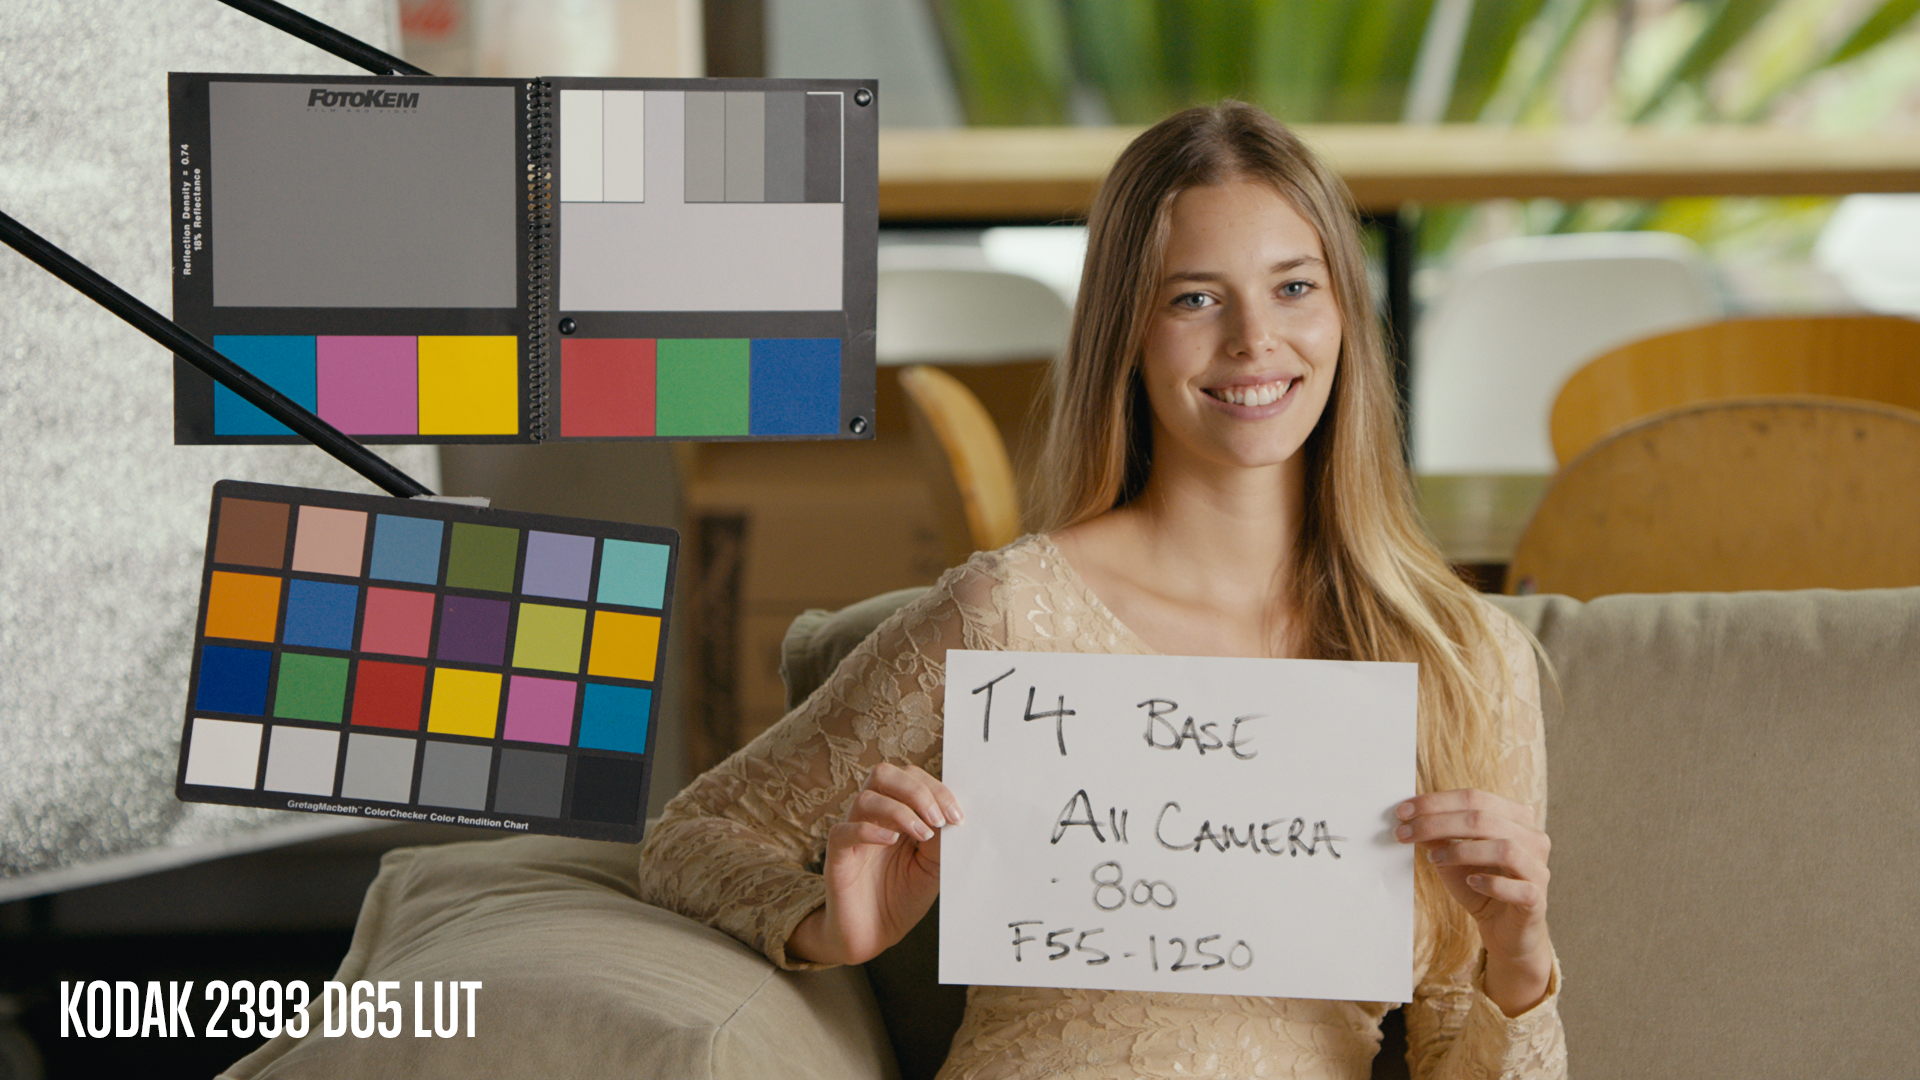
Scroll down to see a comparison between the Kodak 2393 PowerGrade and the real Kodak 2393 LUT.
This 2393 PowerGrade is built differently to my previous 2383 PowerGrade. It’s a lot easier to understand and a lot easier to edit. While at the same time being a lot more accurate.
POWERGRADES VS LUTS
The main benefit of a PowerGrade is that it is fully editable. You can see exactly what is being done in each node and can make any adjustments required. You can also enable, disable or switch-out whole nodes to customise the look of the PowerGrade. So for example you can adjust the standard contrasty print film curve to a more gentle curve. Or you can even replace it entirely with a standard Rec709 curve via a Color Space Transform (CST) node.
Usually clients will request for their product or packaging to appear in a certain way or to appear as accurate as possible. This can be difficult to achieve when grading under a standard PFE LUT as certain hue, saturation, luminance combinations just aren’t possible. With this PowerGrade I’ve been able to make adjustments to ensure the correct appearance of the client’s product, while at the same time retaining the film look. Following similar client requests I’ve sometimes used this PowerGrade on select shots within a project that uses the real 2393 PFE LUT and they both intercut seamlessly.
The other huge benefit is that this PowerGrade doesn’t clip or clamp image data. So unlike a LUT, you can recover blown out highlights or crushed blacks in nodes downstream from the PowerGrade.
SAMPLE IMAGES
A selection of images I shot on the ARRI Alexa / Blackmagic Design Pocket 6k, graded using the Kodak 2393 PowerGrade. These images are a good example of the flexibility of the PowerGrade. A real PFE LUT generally pushes greens into yellow/brown territory, which can be difficult to work with. Since every attribute of the PowerGrade is editable, I was able to adjust the emulation to allow for more natural cooler greens.
These are all graded with either the D55 or Native white point node enabled.
The BMPCC 6k footage was transformed to match the Alexa footage using my P6K to Alexa PowerGrade which you can find here: https://juanmelara.com.au/products/bmpcc-6k-to-alexa-powergrade-and-luts. No LUTs were used in any of these grades.














KODAK 2393 POWERGRADE VS THE REAL KODAK 2393 LUT
INTRODUCING THE FILM MATRIX
The Kodak 2393 PowerGrade and PFE LUTs, expect log negative film scans in Rec709 colour space as their input. The closer you can get your footage to negative film, the better your footage will look when using a PFE PowerGrade or LUT.
The film matrix and accompanying curve, approximate the colours, saturation and density of Kodak negative film. Implementing this in a separate node as opposed to modifying the 2393 PowerGrade to create a similar effect, allows it to be used with real PFE LUTs. Such as the ones found here.
Possibly the most noticeable effect of the matrix is the added colour contrast in skin tones, and greens that actually read correctly, as opposed to yellow/brown. The curve adds depth and richness to the image, probably most noticeable in skin tones, and also introduces a slight roll-off in the highlights.
Due to the complexities of negative film, it’s not possible to fully emulate with a 3×3 matrix. But it is possible to at least overcome some of the issues of using the CST method.
Below is a comparison of using a CST to convert to Rec709 prior to the PFE vs using the film matrix and curve. Shown here with the real 2393 LUT.


HOW TO INSTALL
To install the PowerGrades in Resolve, second mouse button click in the gallery window background and select Import. Navigate to the directory where the zip file was extracted and select the .dpx files and click import. If it doesn’t let you select a file, you might need to click the options button at the bottom of the import window and then select .dpx or .drx from the list, then try again.
Once installed the PowerGrades can be applied to the selected shot by middle mouse button clicking on the still in the gallery. Or with a second mouse button click and then selecting Apply Grade.
KODAK 2393 & FILM MATRIX NODE STRUCTURE OVERVIEW

The node structure for the Kodak 2393 PowerGrade and Kodak 2393 & Film Matrix PowerGrade are identical, except for the first 3 nodes.
Node 01 is the film matrix applied in non linear space. This node approximates the colour/saturation of Kodak negative film. It’s not possible to do this entirely with a matrix, so there are some minor adjustments in the hue v hue and hue v sat curves.
Node 02 is the Kodak 250D curve.
Node 03 adjusts the contrast to better match what the 2393 PowerGrade / PFE expects.
Node 04 is the 2393 Colourimetry, this node takes the input colours and maps them to the 2393 colour gamut. By adjusting the key output gain control in the key tab of this node it’s possible to control the intensity of the general PFE look being added to the footage.
Node 05 is LAB Saturation. This adds the push towards teal/blue present in the 2393 PFE LUT. It also adds the warm push towards yellow/gold that occurs to warm colours above a certain luminance.
Node 06 is the standard 2393 PFE curve. It tends to add a lot of contrast so I’ve included Curve 02 in Node 07 that eases the contrast and as an example of a custom curve.
Node 08 adds the slight tint in the highlights and shadows present in the 2393 PFE LUT.
Node 09 is the native white point of the 2393 PFE LUT. When this node is disabled the white point is D65 (6500K). When this node is enabled you will notice a slight drop in luminance, this is an accurate attribute of the real LUT. You can change this behaviour by changing the Luma Mix value from 0.00 to 1.00. This also applies to the D55 WP node below.
Node 10 enabling this node changes the white point to D55 (5500K). Using the key output gain control in the key tab of this node it’s possible to adjust the white point from D55 (1.000 gain) to D60(0.500 gain) to D65 (0.000 gain) or anywhere in-between. When this node is disabled the white point is D65.
HOW TO USE THE POWERGRADES
Just like a standard PFE LUT these PowerGrades expect log footage in Rec709 colour space. Exact setup and usage instructions depends on which PowerGrade you use.
Kodak 2393 PowerGrade: Generally I’ll use a CST node just prior to this PowerGrade to convert from the camera’s wide gamut colour space into Rec709. You can also use the same CST or an additional CST earlier in your node graph to convert from the camera’s original gamma into log. I usually do this at the start of the node graph and usually convert into ARRI LogC.
Kodak 2393 & FM PowerGrade: Applying this PowerGrade to Alexa footage or P6K/P4K footage converted via PxK2Alexa requires no extra setup, just disable or remove the ARRI Rec709 LUT and append to the node graph. If you’re using it with any other camera, add a CST node prior to the Film Matrix node to convert from your camera’s original colour space and gamma into ARRI colour and ARRI LogC gamma.
Generally PFE LUTs sit as the final node or close to the final node in the node graph. I use these PowerGrades in exactly the same way. The PowerGrade sits at the end of the node graph, and most grading takes place prior.
For the Kodak 2393 & FM PowerGrade, I correct major exposure and temp/tint issues prior to the Film Matrix. Then I treat it as if it was real negative film, and grade after the 250D film curve node. If you’re using PxK2Alexa, make major exposure and temp/tint issues prior to PxK2Alexa, then grade after the 250D curve.
As with the real 2393 PFE LUT I usually apply a tiny bit of noise reduction in the first node of the node graph. I use Spatial NR with Mode set to Faster, Radius set to Small. Then under Spatial Threshold I unlink Luma and Chroma and leave Luma at 0.0 and set Chroma to around 8.0.
Unlike a standard PFE LUT these PowerGrades do not clip or clamp image data, so there is no real penalty in grading after them. Usually I only do final adjustments like sharpening, black level or black tint corrections downstream from a PFE LUT, but with these PowerGrades It’s possible to continue grading downstream without worrying about clipped image data.
Once I’ve completed any adjustments to the PowerGrade I usually select all the nodes and create a Compound Node. This groups everything into a single node which takes up less space in the node graph, and makes it easier to copy between shots. But at the same time it is still fully editable if need be.
UPDATES
27.05.2022 The PowerGrade has been fully rebuilt for better results and more accuracy. The 250D film matrix has been replaced by the FilmUnlimited 250D emulation.
12.03.2020 Added the film matrix and curve to approximate the colour, saturation and density of Kodak negative film.
31.01.2020 Initial release.
SUPPORT
Unless otherwise specified, all digital-products in our store are non-refundable after purchase. However, when purchasing digital products (LUTs and other digital goods in the form of software or files), the buyer automatically waives the right of withdrawal, as digital goods / downloads become irrevocably the property of the buyer after the download. In this case, a revocation can only be made if the buyer has not yet downloaded the files. If the buyer requests a refund and a download has not been performed, we will honor a full refund to the customer. If you have any questions, please visit our Contact page or email us directly at buylutz@gmail.com
RELATED PRODUCTS
DJI Power LUT Full Pack
HALLOWEEN LUTS PACK
$9,00
MLUT Film 2 Motion VFX
$39,00
MLUT Film 2 Motion VFX - 30 Professional LUTs Inspired By The Film Industry. Compatible with LOG and Rec.709 – use mLUT Film 2 Pack.CUBE files with your favorite video editing and compositing software in the post-production process or loads them up directly into a device that supports them.
Compatible With All Editing Software Adobe Premiere, Final Cut Pro X, DaVinci Resolve, Sony Vegas more.Sony Natural LUT Pack
$9,00
Sony Natural LUT Pack | SLog2 & SLog3 to Enhanced Rec709 LUTs
Convert your high dynamic range Sony S-Log2 & S-Log3 to a naturally enhanced look. Designed to fix Sony's skin-tone issues and highlight roll-off. The main LUTs work with all Sony cameras using S-Log2 LUTs & S-Log3 LUTs. Monitor LUTs included.
Scroll down for specifications & more!
VT Explore LUTs
$12,00


